Appearance
Managing Participants
When you create a new Transaction, you are required to include at least one Document, one Participant, and one Task per Document/Participant. However, after the Transaction is created, you can add new Participants or update existing Participants via the API at any point as long as the transaction is still in the Pending status.
Insert a Participant
In order to insert a new Participant into an existing Transaction, you'll need provide Transaction ID along with the new Participant's details.
csharp
var req = new ParticipantInsertRequestModel()
{
    Participants = new List<object>
                    {
                        new ParticipantInsertModel()
                        {
                            TransactionID = 1234567890,
                            FullName = "Sally Smith"
                        }
                    }
};

var api = new ParticipantsApi(myRestEndpointUrl);
var results = api.InsertParticipants(req, apiKey, apiSecret, apiUsername, apiPassword);
if (results.IsSuccessful.Value)
{
    //do work...
}
else
{
    //handle error
}
Update a Participant
In order to update an existing Participant, you'll need to retrieve an existing "Updateable" Participant first. Once you have the ParticipantUpdateModel you can add/update/delete any properties you wish from that object and then all the UpdateParticipants() method to commit the update.
csharp
var req = new ParticipantUpdateableRequestModel()
{
    IDs = new List<object> { 1234567890 }
};

var api = new ParticipantsUpdateableApi(myRestEndpointUrl);
var results = api.GetParticipantsUpdateable(req, apiKey, apiSecret, apiUsername, apiPassword);
if (results.IsSuccessful.Value)
{
	results.UpdateableParticipants[0].EmailAddress = "test@test.com";
    var updateModel = new ParticipantUpdateRequestModel()
	{
	    Participants = results.UpdateableParticipants
	};

    var api = new ParticipantsApi(myRestEndpointUrl);
	var updateResults = api.UpdateParticipants(sa, updateModel);
	if (updateResults.IsSuccessful)
	{
		//do work...
	}
	else
	{
	    //handle error
	}
}
else
{
    //handle error
}
Reassigning a Participant
There may be a scenario where you're not sure if the person you're sending your signature request email to is the correct person to sign you document. You can enable that Participant with the ability to "reassign" this role to another person. To do this when creating a Transaction, you can set the AllowReassignment on the ParticipantInsertModel (or on the ParticipantUpdateModel if you are updating the Participant).
On a normal Workflow page (all pages other than the Signing page) after the Participant is authenticated, the reassign button will show in the bottom-right corner of the page. 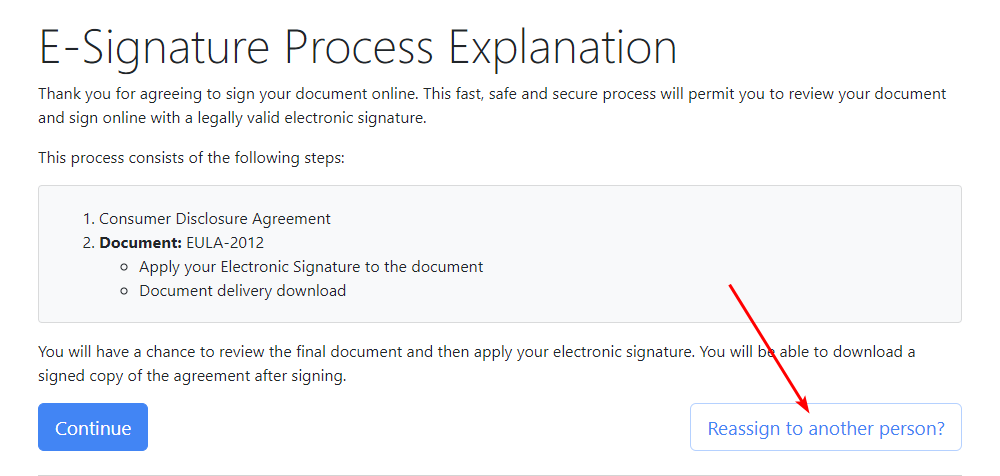
On the Signing page, the reassign button will show in the top-right corner of the page. 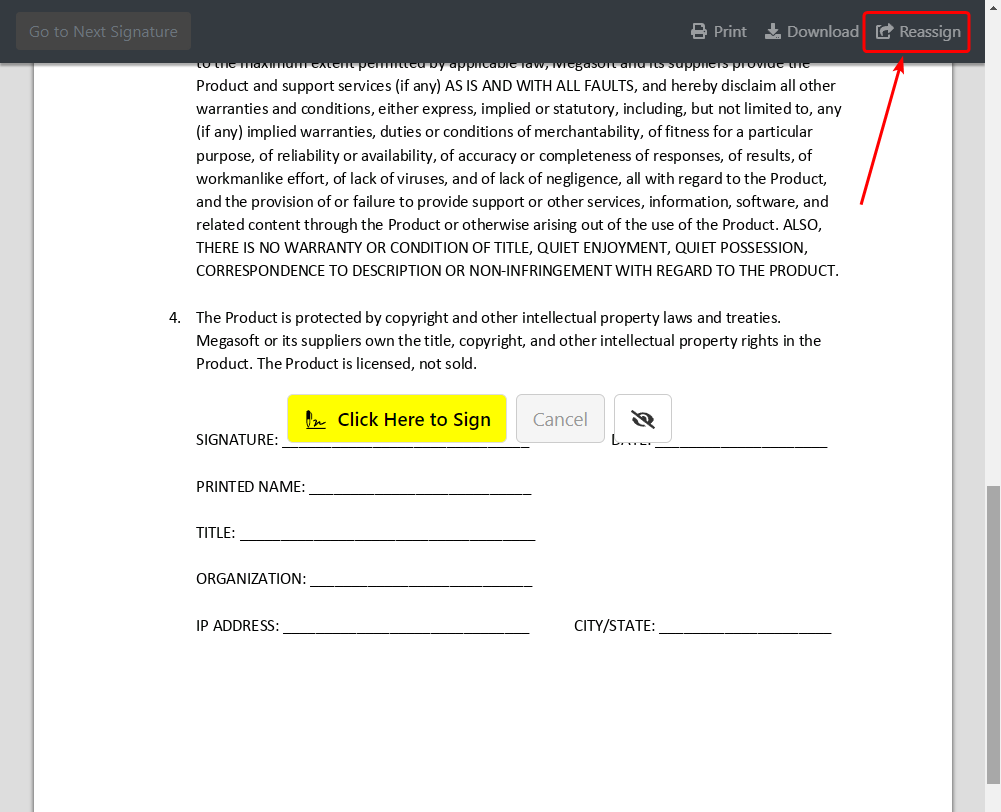
If the reassign button is clicked, the Participant will be brought to the Reassign Participant page where they are enter in the data of the person they would like to sign the documents in their stead. 